This 24 piece pack of heart shaped cards was purchased at Michael's about 3 weeks ago. I thought I would use at least one this Valentine's Day and leave the rest for next year (only because I have been very busy with my, now, 4 month old son). I paid $1.99 and thought it was a great deal being that it also came with the envelopes.
Below is the step by step process I took to make this card.
(click on photos to enlarge)
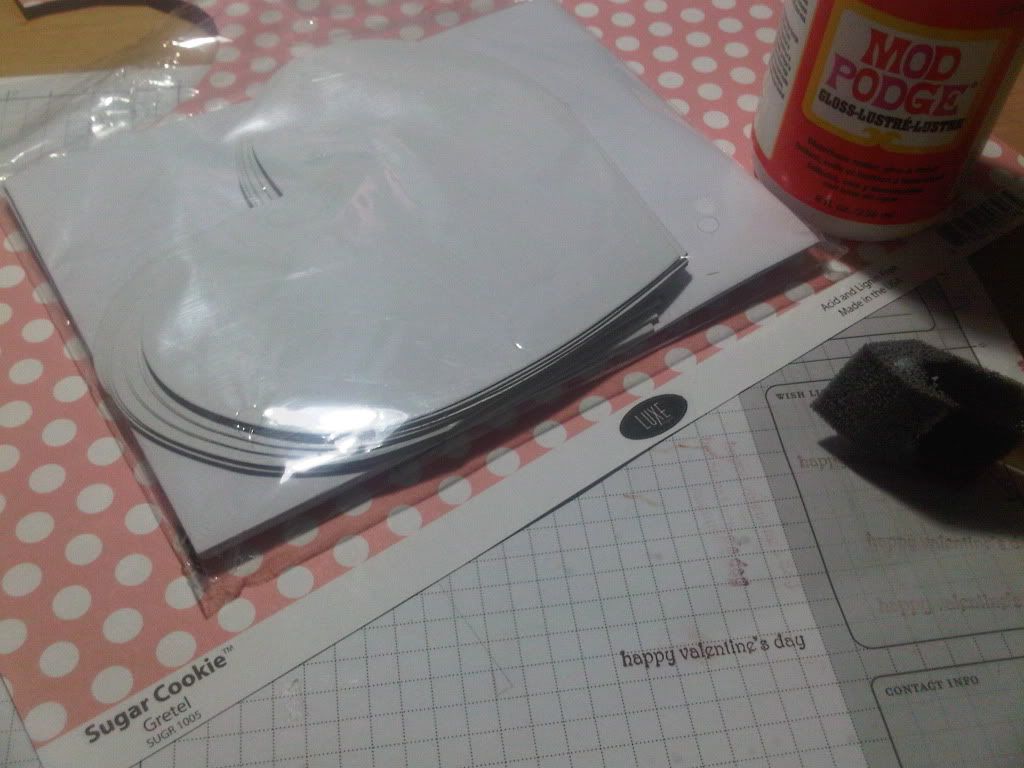
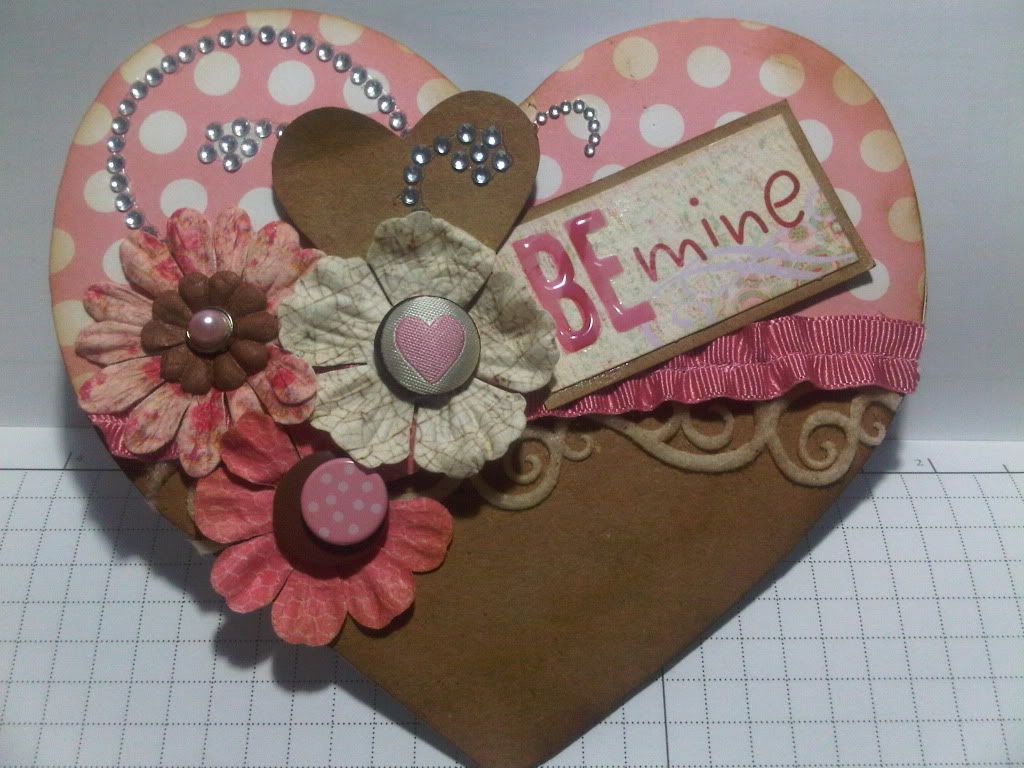
The paper I used was from Luxe. I used Mod Podge (because I'm finding it's faster than glue or tape runners), and let it try before I cut around the shape of the card.
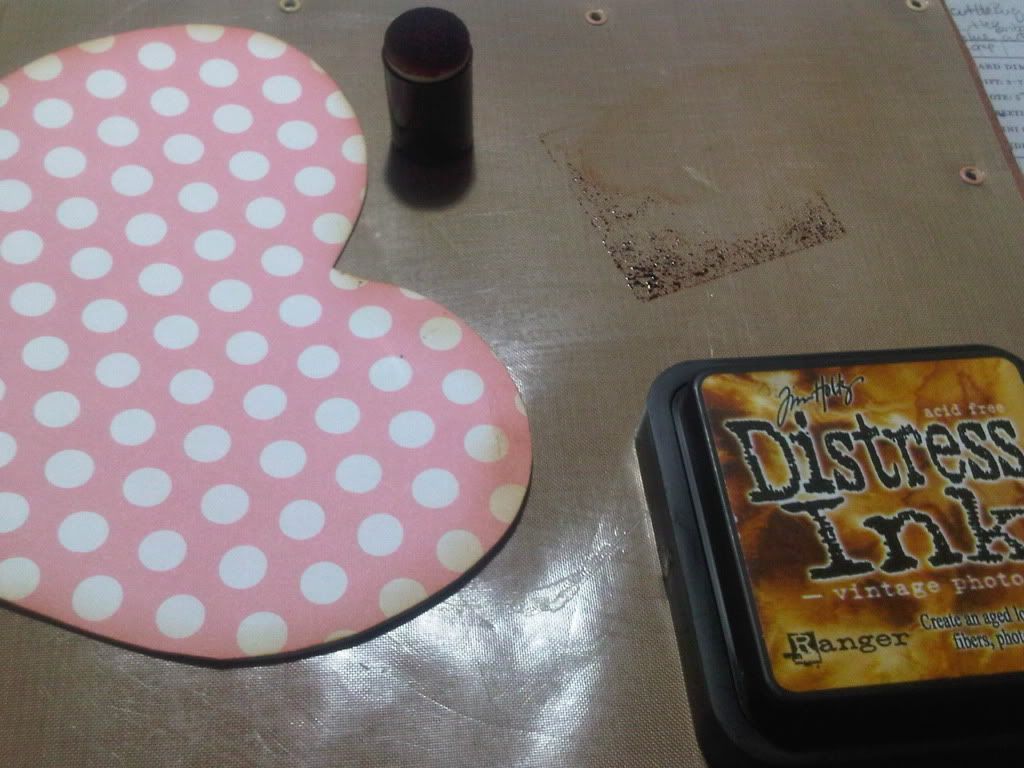
Using Ranger Ink, I distressed the edges slightly with a dauber.
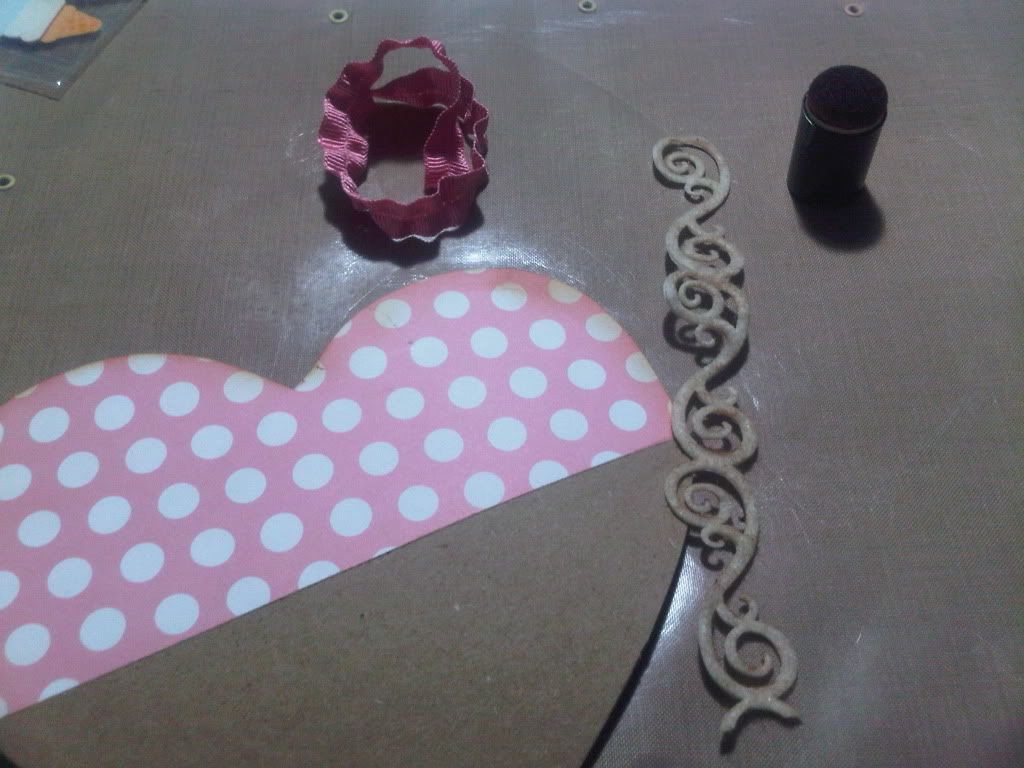
I covered the bottom half of the card (to cut the monotony of those dots and bring depth to the layout) with craft cardstock. I found this swirl felt self-adhesive trim in my ribbon drawer that I had for more than a e year and it seemed to be the perfect fit for the "look" I wanted to create. The swirl trim was too white, so I distressed it a bit with the leftover ink that was on the dauber. The pink/rose trim (that I used on the Altered Heart Wooden Frame) was placed over the swirl trim using glue dots. (I didn't have time to let the glue gun heat up).
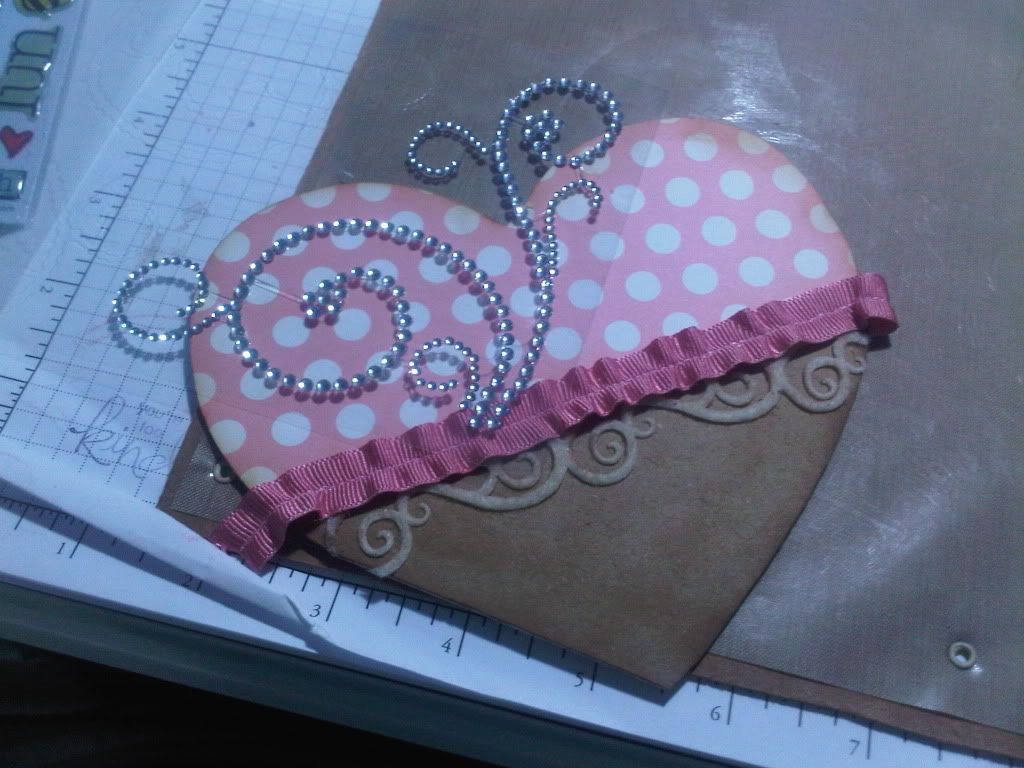
I added bling in just the perfect area above the trimmings.
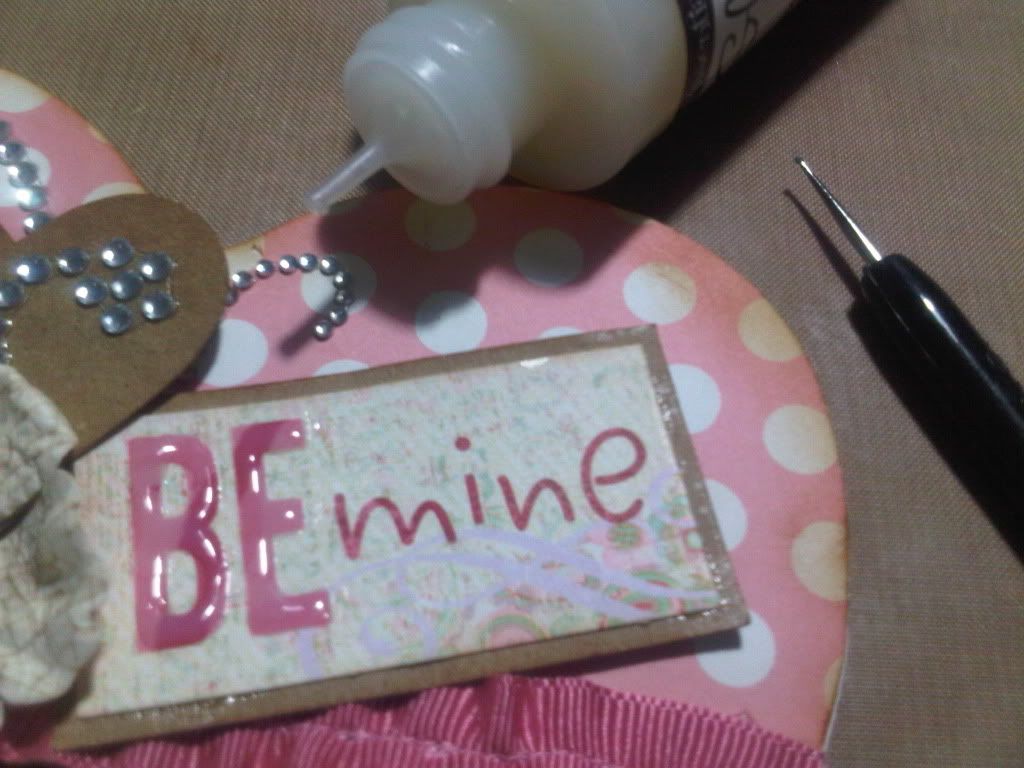
I went through my "LOVE" drawer and found some cardstock phrases by Daisy D. and instead of stamping a sentiment, I matted the piece with craft cardstock, distressed the edges and added Glossy Accents on the "BE MINE" to make it pop and shine.
I embellished with Recollections Flowers, punched a heart out of the same craft cardstock, inked the edges and added bling, and used brads and buttons to enhance the flowers.
I hope you were inspired and if you have any questions, please ask.
Thank you.
x0, Damaris
Below is the step by step process I took to make this card.
(click on photos to enlarge)
The paper I used was from Luxe. I used Mod Podge (because I'm finding it's faster than glue or tape runners), and let it try before I cut around the shape of the card.
Using Ranger Ink, I distressed the edges slightly with a dauber.
I covered the bottom half of the card (to cut the monotony of those dots and bring depth to the layout) with craft cardstock. I found this swirl felt self-adhesive trim in my ribbon drawer that I had for more than a e year and it seemed to be the perfect fit for the "look" I wanted to create. The swirl trim was too white, so I distressed it a bit with the leftover ink that was on the dauber. The pink/rose trim (that I used on the Altered Heart Wooden Frame) was placed over the swirl trim using glue dots. (I didn't have time to let the glue gun heat up).
I added bling in just the perfect area above the trimmings.
I went through my "LOVE" drawer and found some cardstock phrases by Daisy D. and instead of stamping a sentiment, I matted the piece with craft cardstock, distressed the edges and added Glossy Accents on the "BE MINE" to make it pop and shine.
I embellished with Recollections Flowers, punched a heart out of the same craft cardstock, inked the edges and added bling, and used brads and buttons to enhance the flowers.
I hope you were inspired and if you have any questions, please ask.
Thank you.
x0, Damaris


No comments
Post a Comment